Instruction – Putting 101

Putting is considered the most critical element of golf, where finesse, precision and confidence come together. While much attention is given to putter design and green reading, the putting grip – a player’s connection to the club – can significantly influence performance. The right grip offers control, consistency and comfort, helping players roll the ball with confidence. Here’s a guide to two of the most common putting grips and how they can impact your game.
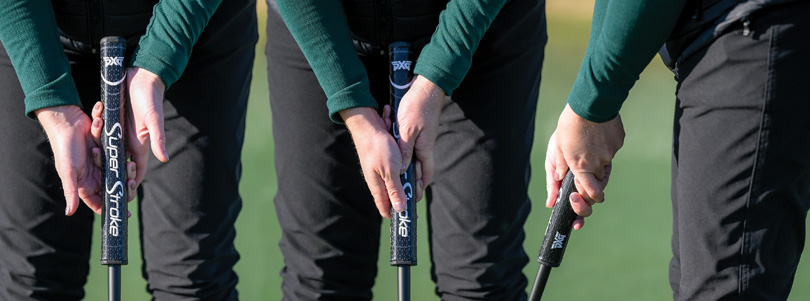
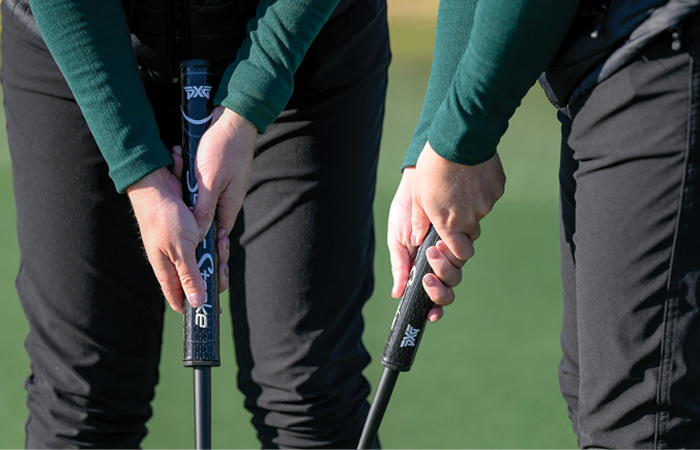
Conventional Grip
The conventional grip is the most widely used putting grip in golf. This style mirrors the standard full-swing grip, where the dominant hand (right hand for right-handed golfers) is placed lower on the shaft.

Key Features
Familiarity for players transitioning from full swings.
Encourages a natural, pendulum-like stroke.
Who Should Use It: Golfers who prefer simplicity and rely on their dominant hand for control.
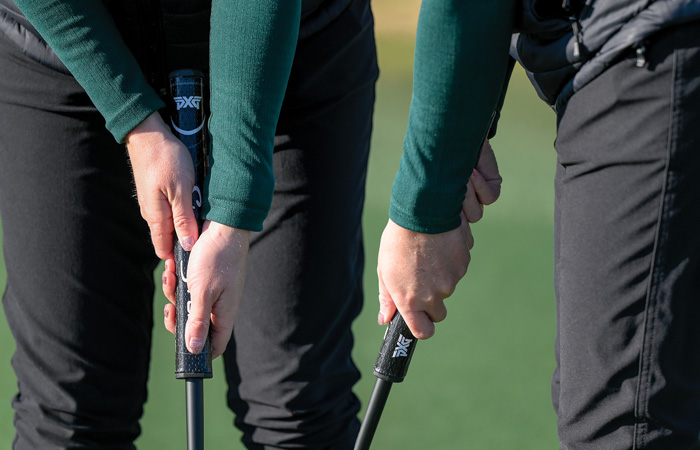
Cross-Handed (Left-Hand Low) Grip

In this grip, the lead hand (left hand for right-handed golfers) is placed lower on the grip than the trailing hand. This method is increasingly popular among players of all skill levels.
Key Features
Promotes a square clubface at impact.
Reduces wrist movement for greater stability.
Who Should Use It: Golfers who struggle with consistency in their stroke or tend to push or pull putts.
Choosing the Right Grip
Selecting a putting grip is a highly personal decision. Factors such as hand size, putting style and stroke mechanics all play a role in determining the ideal grip. It’s essential to experiment with different options and practice to find one that feels natural and improves your performance on the greens.
The putting grip is not just a technical choice; it’s a matter of personal comfort and confidence. Whether you’re a weekend golfer or a Tour professional, refining your grip can lead to more consistent putts and lower scores. Remember, the best putting grip is the one that allows you to trust your stroke under pressure.
The Tiger Woods Putting Gate Drill
The putting gate drill is a simple, yet highly effective, practice technique used by Tiger Woods to develop precise control over his putting stroke and improve his accuracy.
Setting Up the Drill
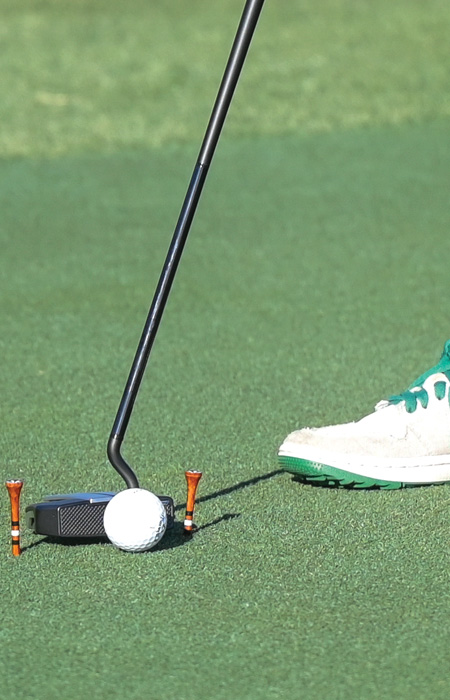
Equipment Needed: A putter and a golf ball. Two tees
Create the Gate: Place two tees on the green, just wide enough for your putter head to swing through.
Choose a specific hole or an alignment line on the green as your target.

The Goal of the Drill
The objective is to putt the ball through the gate without your clubhead touching the tees, ensuring the ball stays on your intended line.
This trains your ability to start the ball straight, which is essential for making putts.
It also highlights any flaws in your stroke, such as pushing or pulling the ball.
Practicing with the Drill
Take your stance and align your putter face squarely to your target line.
If your clubhead touches one of the tees, it’s a sign that your stroke path or face alignment needs adjustment.
Benefits of the Tiger Woods Putting Gate Drill
Improves Alignment: Ensures your putter face is square at impact.
Refines Stroke Mechanics: Identifies and corrects issues like a pushed or pulled stroke.
Versatility: Can be used on the practice green or with an indoor putting mat.
Whether you’re a beginner looking to establish sound fundamentals or an advanced player fine-tuning your precision, this drill will help you roll more putts on line and sink more putts under pressure.


