


Instruction — The Versatility of Alignment Sticks


Over the last few years, practice on the range, for many, has involved a training aid called aiming sticks. These sticks are used for a variety of different facets during golfer’s practice sessions. Aiming sticks had a different purpose when I was growing up in upstate New York. You would purchase them at the local hardware store to line your driveway so the plows wouldn’t encroach in to your yard when clearing the snow from the driveway. I guess we don’t have that problem here in Texas.
Now these sticks are utilized for alignment, checking your swing plane and defining a start point for your golf ball. The sticks prove to be very useful as they give a great visual for the purpose they’re being utilized. There’s many ways to use the sticks. Below I’ve listed my favorites:
Aim and body alignment • Placing an aiming stick in between your feet and the ball is a wonderful way to reinforce the alignment of your body parts as well as the direction you’d like to hit the ball. I like to place the stick in line with the target with the ball and the student’s feet equidistant from the aiming stick. When you watch a Tour pro practice, they are very exact in getting their body alignment and aim exact. Their “gun” shoots straight, so all that’s left is aim. Amateur golfers can always work to improve their “gun” shooting straight; however, they’re usually very much in need of aligning their body and point toward the target as well.
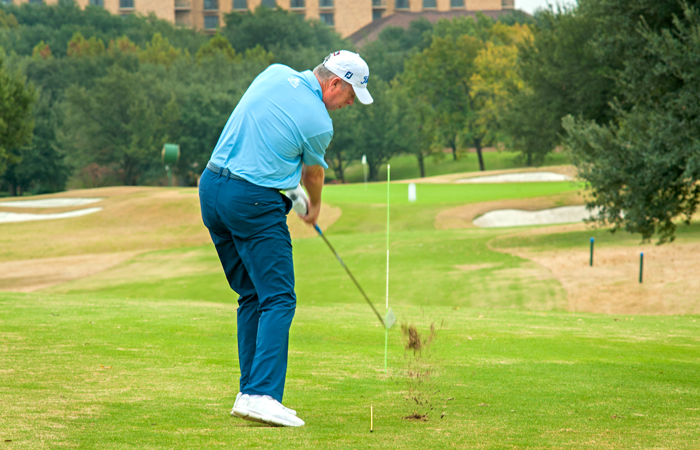
Swing plane • Aiming sticks are an excellent tool to check your swing plane. I’ll place a stick just outside a player’s back foot, in line with the golf shaft at address, and ask them to allow their takeaway to swing along the angle of the stick from ground level to hip level. This visual shows the student exactly where the club should go as the swing begins. It works well for short game shots too.
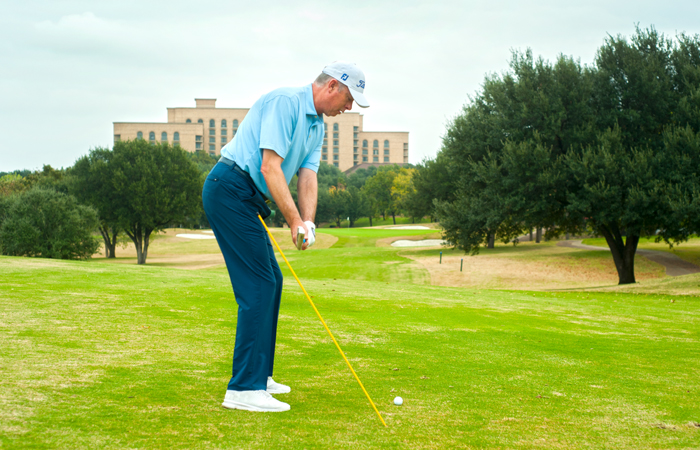
Start line for the ball • I will place a stick about 10 yards in front of the ball on the target line to allow the student to understand where the ball should start. This is a very telling exercise for amateur golfers. It’s one that’s quantitative and helps define the swing direction of the downswing and follow through. For a draw, I like to see the ball start slightly right of the aiming stick. If I’m teaching a fade, I want the ball to start to the left of the aiming stick.
The use of these sticks doesn’t stop with these three examples. You can be very creative in how you can access them. The important thing is that you create a visual aid that helps you improve your swing and ball flight. I highly recommend keeping one or two of them in your bag so that they’re handy for your next practice session.
Tim Cusick is the Director of Instruction at the Four Seasons Resort and Club/Dallas at Las Colinas. The Northern Texas PGA named Cusick Teacher of the Year in 2005, 2009 and 2015, as well as the 2014 Horton Smith Award winner for education. He’s the author of ‘The Four Keys to Improve your Swing.’ Follow him on Twitter @timcusickgolf and visit his website: timcusickgolf.com.