
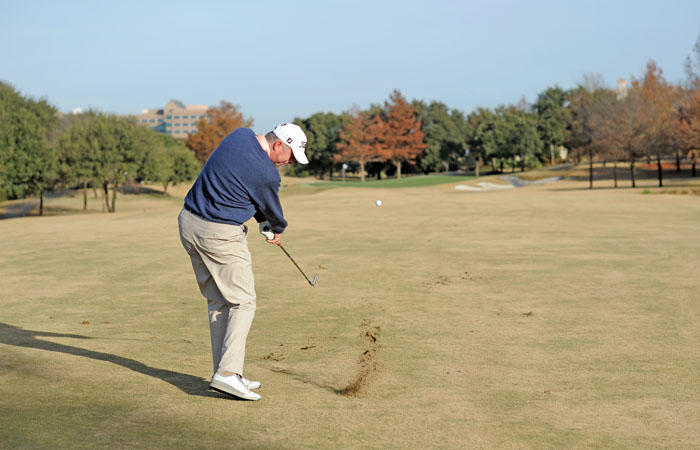
When I ask students the shot they dread the most it is almost always the green side bunker shot. This is usually because they don’t have the proper setup to hit the shot. Setup is key to hitting a green side bunker shot, as it sets up the entire swing. One of my favorite quotes about bunker shots comes from the great Jack Nicklaus, who said: “Does a sand shot scare you?¨ “Well it really shouldn’t, it’s the only shot in golf where you don’t have to hit the ball first.”
Wow, what a relief to know you get to actually hit the sand before the ball. Let’s get started with proper setup and the most common mistakes I see which cause those dreaded shots left in the bunker or skulled over the green into the pond.
A few of the common mistakes I see are poor ball position and aggressive grip pressure. Some of my students tend to play the ball towards the back of their stance and strangle the club in their hands.
I want you to think of holding a baby bird when you swing and play the ball in line with your lead heel. When the ball is played too far back in the stance, it can cause you to dig too deep into the sand, leaving the ball in the bunker. Another mistake I see often is students leaving their weight on their back foot at setup or while they swing. This will cause you to skull the ball over the green. When you setup it is vital you have sixty percent of weight on your lead foot and leave it there throughout the entire shot.
Lastly, have you ever heard someone say: ¨use the bounce’’ and wondered what it means? You’re not alone, because I get this question all the time. Let´s refresh, you have learned your ball position needs to be inside your left heel and weight needs to be sixty percent on the lead foot. Once you’ve done this open your clubface slightly as well as your stance, and have your grip pointing towards your belly button at setup, if the grip is pointing towards your lead hip or inseam of your pants it is going to be nearly impossible to use the bounce of your wedge. Now, that you’re properly setup, make a swing splashing the sand about two inches behind the ball with the back of the clubface (now you’re using the bounce).
A couple keys to take note of in this demonstration. No. 1 Notice how my grip is pointing towards my belt buckle and not in front of my belt buckle at setup, this is vital to be able to use the bounce of your wedge. No. 2 My clubface never rotates over after setup, I start with a slightly open face (clubface pointing to the sky) and finish with my clubface pointing to the sky after impact.
Drill: Place a folded towel about two -four inches behind the ball and hit shots splashing the sand in front of the towel with the back of your clubhead. If you hit the towel this means your weight is on your back foot and needs to be on your lead foot.
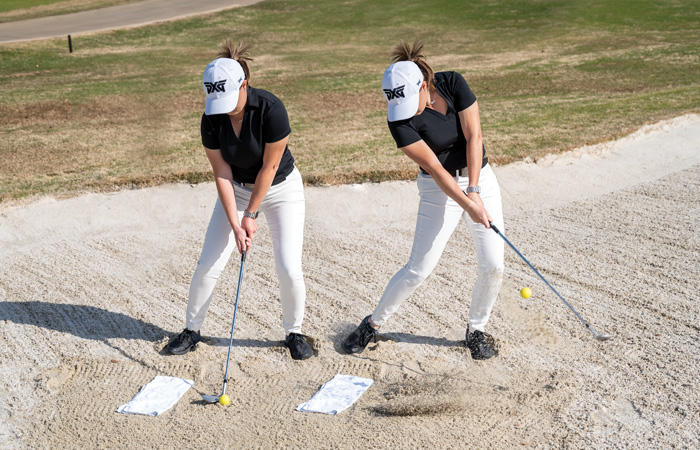
You can see in the picture I finish with my clubface pointing to the sky after impact, this ensures you are using the bounce of the club. Now, how do I do that? We already talked about the proper setup, which will help with this. The last key is making sure you keep the same speed throughout the entire swing making sure your hips, chest/shoulders and head continue to rotate through impact. I see many students stop rotating as soon as they hit the sand.
Drill: Alignment stick is placed at a forty-five degree angle six inches outside of the lead foot in line with the toes of the lead foot. Hit shots splashing the sand with the back of the clubhead and finishing with the clubhead in front of the alignment stick with the clubface pointing to the sky as well as your hips, head and chest/shoulders facing your target.

Kirsten Pike is the lead Teaching Professional at Las Colinas Country Club. To improve your scores follow her on Instagram at kirstenpike_golfinstruction and visit kpikegolf.wixsite.com