
Greetings avid golfers, and welcome to the 100+ days of fun that we call summer. For the detailed conscious among us, summer 2023 officially starts on June 21, on the longest daylight day of the year – or the summer solstice. You should most certainly plan on getting in 36 holes on that day, as it is considered in some golf circles a high holiday, given the amount of daylight available.
However, June also marks the start of lawn renovation season for warm season grasses such as Bermuda, Zoysia and Saint Augustine. The last few winters have been extremely tough on our warm season lawns, especially shaded lawns (less than six hours of direct sunlight and north-facing lawns that are most prone to winter desiccation and cold damage). It is for all these reasons that June is the month that I get the most questions about lawn renovations, in particular, sod prep, so this month’s burning question is “how do I prepare my lawn for new sod?”
Lawn renovation basics
Once you have realized that your lawn no longer meets your expectations for beauty and function, and you are ready to renovate (you have also chosen to do it yourself and not hire a qualified landscape contractor), you must choose between seeding and sodding. Seeding is generally cheaper but takes much longer to establish, which has inherent risks. And sodding is more expensive but has instant impact. Remember that you are buying more than the grass; you are also buying ½” or more of quality soil, which, if your soils are in question, can be a huge step in the journey to a great home lawn.
Our focus today will be on sod as a lawn renovation solution. Once you have decided to resod an existing lawn and measured the square footage of the area to be renovated (the area impacts all of the quantities of raw materials, including sod), there are seven critical steps. No. 1: Kill all unwanted weeds and other species of grass in the area. No. 2: Remove any unwanted organic debris. No. 3: Install drainage, irrigation or utilities. No. 4: Add any soil or sand to establish a rough grade that will sustain the site. No. 5: Add any fertilizer or amendments and incorporate them as needed and establish the finish grade. No. 6: Select the turf type and order the sod. No. 7: Install the new sod (green side up) and water.
Killing unwanted weeds and other grasses
A weed is any plant growing out of place. So if you’re switching grasses, you will want to kill all of the old turf before installing new sod. It is amazing how once a plant is not wanted, how resilient it becomes.
The best way to accomplish the removal of these plants/weeds is to apply a non-selective herbicide at label rates. There are many herbicides available at your local garden center, manufactured for residential use, and they can be applied with a variety of handheld or backpack sprayers. Simply follow the label directions and, in most cases, you will need to apply two applications seven to 14 days apart to get the best results. I would also recommend using a product that has a non-ionic surfactant to help the herbicide stick to and ultimately be absorbed by the plant. You should see results in just a few days, depending on weather conditions.
Remove any unwanted debris and organic material
Once you have successfully killed all of the unwanted plants, there is usually a large amount of organic material left behind. There are old roots, shoots and stems, maybe even leaves, rocks, roots or other things that will interfere with the establishment of the new sod. Now is the time to get the shovel, wheelbarrow or bucket, put some sweat equity into the project and remove all of this material. If there is a large quantity, you may consider renting a sod cutter and remove the upper inch or so to clear the upper part of the root zone to take care of any stolons or rhizomes that may be present. This step is often skipped, and then creates big problems later. The rule of thumb is that the better the prep work is, the better the results will be … whether at home or at the club.
Install drainage, irrigation or utilities
It is important to make sure that any in-ground pipes or infrastructure are installed before you establish the finish grade of the area. Be sure you call the local utility companies to locate any existing lines, as they say, “call before you dig.” If drainage has been an issue, now is the time to install catch basins, transfer pipes or French drains. Make sure you have positive water flow and that all of your connections are solid, and the pipes are functioning properly. It is also a good time to run any conduit, cable or other utilities that may need to cross the area. Think ahead to any future plans, such as an outdoor TV for watching the big game. It will never be easier to install these items than during your lawn renovation.
Add any soil or sand to establish a rough grade
Once all of the in-ground infrastructure is in place, you need to establish a rough grade that will move surface water and allow the area to function as you envision. Be sure to level any low spots, especially trench lines, and make sure that any areas that have been disturbed are packed with a tamp or roller to minimize any settling of the soils. This is the step where you can easily add heavier soils or coarse sand to improve or level the site. Remember this is not the finish grade, but it is the foundation for the finish grade. It is also possible that the existing rough grade is sufficient. If the area has a gentle consistent slope and surface water moves well, you may skip this step.
Add any fertilizer or amendments
Fertility and soil structure are vital to the success of your lawn renovation. You can have a quick soil test done for just $12.00 by the Texas A&M Agrilife Extension Service, providing basic soil analysis and recommendations on the crop (be sure to list the type of grass sod being grown). You can get all the information about soil testing, including how to take a proper soil sample at their website: soiltesting.tamu.edu. The soil report will tell you the exact formulation of fertilizer to use for your site.
At the minimum, I suggest putting down a complete organic fertilizer with mycorrhizae, Earth Works makes a great 3-3-3 product with mycorrhizae that will really help the sod establish quickly. I would also suggest a starter fertilizer high in phosphorous (the second number on the fertilizer bag 10-20-10), applied over the top after the sod is laid. Remember to calibrate your spreader, applying half the recommended rates in two opposite directions for maximum uniformity of the application, and follow all application and watering instructions listed on the fertilizer bag. Now is also the time for you to incorporate any amendment to add sand or other materials to complete the finish grade.
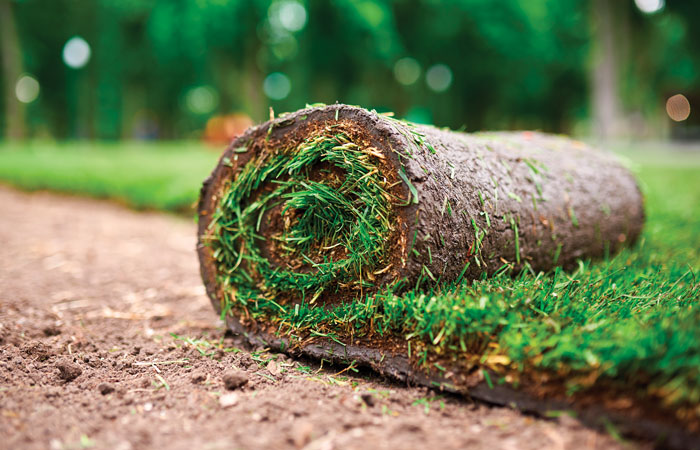
Select the turf type and order the sod
We will not go into too much detail on the strengths and weaknesses of all of the available sod in our area, but trust the growers to give you what is available. A quick online search can usually help you decide turf type. I will, however, say that recently some good performers, including Saint Augustine for heavier shade, Zeon Zoysia for light shade and TifTuf Bermuda in full sun, have all shown resilience even with the recent cold winters and dry summers. Remember that no plant is completely weatherproof. Be sure to order enough extra sod to account for waste as you cut in the odd spaces, usually 3 to 5%, depending on the shape of the area.
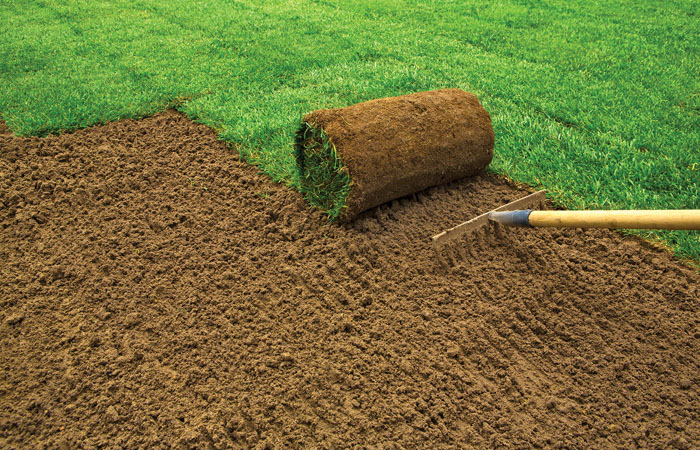
Install the new sod (green side up)
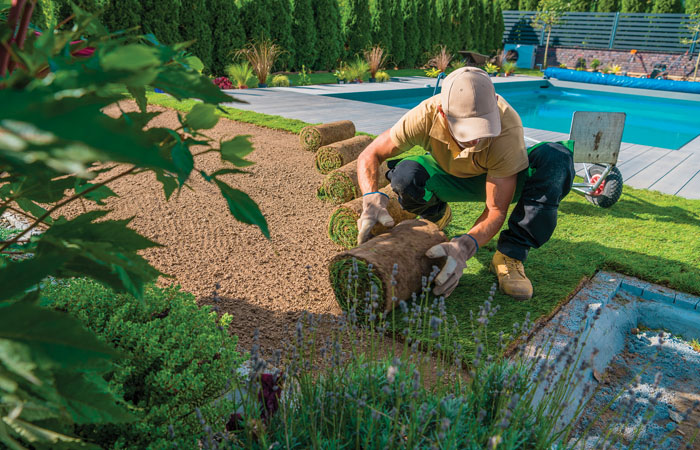
It’s show time! Are you ready to take the after picture? Be sure to coordinate with the sod farm or nursery on the delivery day and time. Professional tip: check the weather forecast; no one likes laying sod in the rain. Also, if you know where the sod farm is, remember that rain can delay harvesting the grass … it happens. When the sod arrives, have it placed close to, but not in the way, of your work area. You may offer a tip to the driver for special pallet (roughly 500 square feet) placement; it saves time and is totally worth the investment.
Installing the sod is pretty easy, but physically demanding. It’s like a jigsaw puzzle. Start in the longest run and place that first line end to end, touching lightly to avoid gaps. Working off this first line, alternate the sod lines by placing a half square of sod as the first piece on the next row and alternate accordingly. You will eventually have to cut in odd shapes. Use scrape pieces as often as you can, but if the quality is low, discard and use a better, larger piece, especially in small, rounded areas with high traffic. You can also buy sod staples if you have sloped areas to hold the sod in place until it roots. They are small metal staples that you slide through the sod into the soil; simple but effective.
Time is of the essence, so move quickly to get the sod off the pallets and on the ground. Then apply light fertilizer if desired, but be sure to water thoroughly as soon as possible. Keep the sod wet for the few days and monitor the moisture for the first several weeks. Your new sod is going to experience some transplant stresses. Do not add drought stress to the mix or you may kill your new lawn before it tacks (roots to the ground).
That’s a wrap, avid golfers. Good luck on your sod projects this season, and I hope that you win yard of the month. One of my golf turf mentors once told me that, “quality turf is not a matter of life or death … it is much more serious than that.” He also said every time we laid sod, “Green side up.”
Until next month, manicure your lawn, play lots of golf and, of course, keep reading AVIDGOLFER magazine.