
If you’re looking for great value and a challenging layout, then look no further than Old Brickyard in Ferris. Now, you may be thinking, Ferris? Where is that? Well, Ferris is just about a 25-minute drive south on I-45. In fact, Old Brickyard is right off the highway access road, so as you head south on 45, you can see it from the highway.
Although you may not think the City of Ferris would offer much in the way of quality golf, we were pleasantly surprised during our visit last month. The course features some great holes, with quality routing and well above average conditions for a value priced course.
The clubhouse at Old Brickyard has nice bones, with some merch and a bar area with plenty of tables to grab a quick breakfast, lunch or cocktail before or after the round. It could maybe use a touch of updating, but hey, you aren’t there for the clubhouse, you’re there for the golf course.
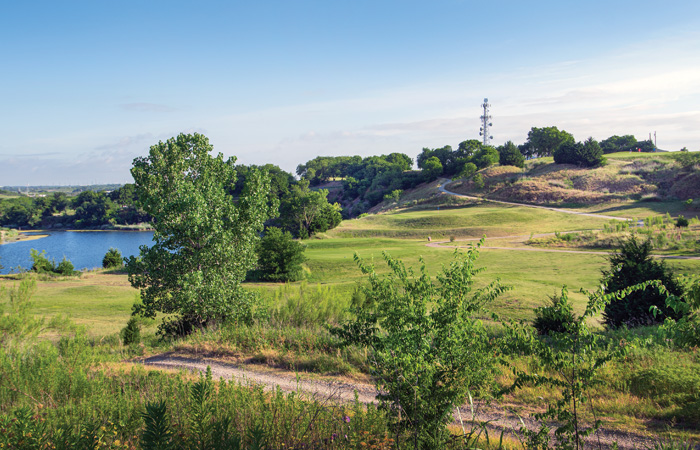
And the course itself is fun. The opening hole leads back to the north to the highest point on the property. A bunker guards the right side of the fairway, but the longer hitters can fly the trap or use a mid/long iron off the tee to take it out of play. Beware, as any shots that miss too far right end up on the driving range. An uphill approach means adding an extra club to a deep green where distance control is at a premium. When you reach the putting surface, take a look to the southwest and enjoy the view of the rest of the property. You can even do a little scouting and take a look at some other pin placements for the day.
No. 2 is the first par-5 on the Brickyard layout. Favor the left center of the fairway for the best angle to attack the green in two. Drives that miss a little right run the risk of kicking down the hill and finding the water on the right. Although it may not seem like the water is reachable from the tee, balls that catch the hill can bound forward and scream directly into it. Those tee shots that find the left center will offer a great chance at an early birdie.
The third hole provides another early opportunity to add a circle to your card. Favor the left side off the elevated tee, as everything will slope back down to the right and chase up near the green. A short, uphill wedge or chip shot will remain to a relatively flat green.
No.4 is the opening par-3 on this layout. Club selection is important on this 172-yard hole. The green is wide from left to right, but not very deep from front to back, making any shots that come up short or carry long a difficult up-and-down. A par is a good score here, and a birdie likely picks up a shot on or two on your playing partners.
The second of this three par-5, three par-3 front nine is the 5th. Shockingly, this plays as the No. 1 handicap on the course, and not the par-3 8th or par-5 10th. The reason being is this par-5 is like threading a needle. The fairway is U.S. Open narrow and usually plays back into the prevailing south wind. Finding the fairway is key, but on a windy day, even that won’t be enough. You will also need to hit a pure second shot to leave 150 or so left into the green for the third shot. That third will need to carry a deep chasm in front of the putting surface. Find it and your 4th shot will be incredibly tricky. It’s a tough par-5 for any skill level.
No. 6 is a fun golf hole. A converted par-4, this 184-yard par-3 has a tee box that is 125-feet above the green, giving players a real feel for where they need to land the ball on the putting surface. Again, with the elevation change, selecting the proper club is a must. Anything short or long makes for a tough par.
Hole 7 is the final par-5 on this 3-3-3 outward nine, and also the final opportunity to gain a stroke before the gauntlet that awaits from No. 8 to No. 12. Favor the left-center of the fairway to have a chance to get home in two. Shorter tee shots require a precision layup with water on the right. Manage this hole properly and add another birdie on the card before the challenging holes ahead.
The locals have dubbed holes eight through 12 as the “Quarry Death March” and once you play Old Brickyard, you will understand why. The first of these holes is the difficult, but scenic par-3 8th. Playing 207 from the tips, this hole is all carry over a water filled quarry lake that taunts players from below. A miss short right can find a watery grave but miss long and left and getting down in three is no easy task. It’s a beautiful, but tough nut to crack.

No. 9 is as awkward a hole as you will find anywhere. It is a shot that definitely requires local knowledge on how to manage it. A narrow corridor through two large hills reveals nothing more than a water hazard in the distance. Most long hitters will need to feather a 3-wood over the middle of the left hill to find the fairway. Driver can also be an option, but be careful if you play a cut, as it could run through the fairway and catch the hazard. This will leave a manageable second shot over water to a green tucked into a natural amphitheater. It’s a great finishing hole to the opening nine at Old Brickyard, but there is no time to relax as the remainder of the quarry death march awaits.
For my money, No. 10 is one of the most unique par-5’s in the Metroplex. This behemoth can force three separate carries over water. However, those players bold enough to test the water on the right off the tee could be rewarded with the chance to make a run at the green in two. For the best chance to avoid a watery grave, take the tee shot down the left-center of the fairway, then choose an optimal layup club to avoid both the water short and a pair of target cross bunkers through the fairway, and leave yourself a short iron, again over water, to the green. Par will always be a good score on the 10th.
The par-4 11th hole is another partially blind tee shot. Yes, you can see the fairway in front of you, but taking a little bit of the dogleg off with the tee shot will leave a more manageable approach. Play to the right center of the fairway off the tee and longer hitters risk running out of fairway and finding the water. Cut the corner a bit and just a sand wedge remains to a green guarded by water on the right and a steep mound on the left.
No. 12 is the final hole of the death march and plays as the fourth hardest hole on the course. Another elevated tee shot that requires a gentle left-to-right tee shot, but if you tend to slice the ball, be careful as water down the right to mean a big number on the card. Players who find the fairway will have just a short iron in, but anything long could take a nasty bounce off the downslope and find water behind the green.
With the stretch of 6 brutal holes in the rearview, another par-3 awaits, this one playing 177-yards from the back tees, but although it is straightforward, the tee shot is all carry over water. This one is an extra club, middle of the green iron shot. Walking away with a par is just fine here.
The 14th hole on this layout is one of the simpler holes on the back nine. If the hole is playing significantly down wind, longer players will likely select a three-metal or hybrid off the tee to take the target bunker through the fairway out of play. This leaves right at 100 yard remaining to a green that slopes severely from back to front. Players that find the back of the putting surface with a middle or front pin could have the initial putt get away leaving a testy cleanup for par.
The 136-yard par-3 15th plays as the easiest hole on the course. The tee is about 40 feet above the green, so make sure you allow for the change in elevation, but this is no more than a short iron to a receptive green and a great opportunity for birdie.
The turn for home means back-to-back holes that test the south wind. The first of the two plays right at 400-yards from the tips and has an elevated fairway. Get a tee shot up into the prevailing wind and it may not reach the high point of the fairway, leaving shots rolling back toward the tee box as they catch the sloped fairway. This can leave a blind second with a mid-iron to a green with a severe mound in the center that can challenge the best of the best with the flat-stick. Although it only plays as the No. 12 handicap, a stiff wind can make it play more like a top-four handicap on the course.
The penultimate hole at Old Brickyard is another straightway par-4 with O.B. all down the right. Find the left center of the fairway to have the best angle at a green with a large hogback in the center that can feed approach shots to the proper side of the putting surface with a strategically placed wedge.
No. 18 at Old Brickyard is one final test, especially off the tee. A miss right is out of bounds, a miss too far left will take a potentially disastrous bounce onto a sidehill lie in waist deep native grasses. Finding the fairway is critical here, as there is little room for error. Be mindful of pin placement on the 18th, as a back pin can be two to three clubs more than one that is up front. A par on the card on the last is a good score and one to keep you coming back again.
Overall, Old Brickyard was a pleasant surprise. The layout is fun, and commands thought and attention. There are very few holes I would consider to be total cupcakes. It really keeps you engaged in the round, especially if the wind is blowing. The fairways and tee boxes were in great shape, and the greens were manageable and fun without being too fast or too lethargic. It’s a perfect spot for those who want a great test, above average course conditions at a solid rate, even on the weekends.
Make the trip half an hour south and enjoy one of the most intriguing layouts in the area. Just make sure you bring a couple extra sleeves for the quarry death march.