One thing all great putters have in common is they have a firm lead wrist at impact and a putting stroke driven by rocking the arms, shoulders and not flicking the wrists. Flicking the wrist at impact can cause a lot of inconsistency in the ball starting on the proper line, controlling the speed of the putt and making the putt finish short or past the hole, depending on the force exerted due to flicking the wrist. The top putters in the world have a stroke where the wrists, arms and shoulders move as one unit.
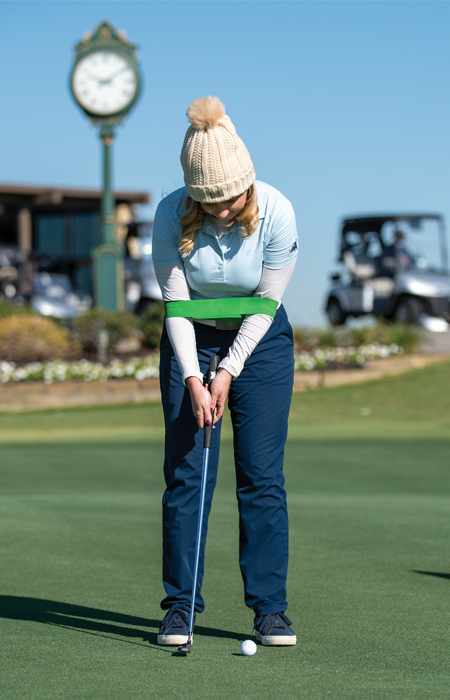
Here are a few things to focus on when working on getting the wrists, arms and shoulders to move as one unit. Place a resistance band around your arms, as I demonstrated, and make some practice strokes keeping the resistance on the band back and through. As you make practice strokes focusing on this, pay attention to how your arms make a triangle and your putter is connected to the triangle. Focus on keeping the triangle together the entire stroke and not breaking the triangle. A good visualization is thinking of a basketball being between your arms. If you putt with a basketball between your arms, your arms, shoulders and wrists are never able to break; the width between your arms stays the same the entire stroke. After you’ve rehearsed keeping the same amount of space between your arms the entire stroke and keeping the resistance on the band, hit some putts with the resistance band still on.
Here are some drills to work on stroke now that everything is moving as one unit.
This drill gives you immediate feedback, rather your stroke is too much inside/outside on the takeaway, as well as too much in-to-out or out-to-in on follow-through. To set up this drill, draw a line on the crease of your home course scorecard. From here, lay the scorecard down and set your putter next to the line you drew. This line will show you if your putter face is closed, open or square at setup. From here, grab four tees, placing them at the end of your scorecard at all four corners just outside of the toe and heel of your putter. From here, hit putts without hitting any of the tees with your putter face. Only practice this from seven feet and in.
This drill works the same way as the scorecard drill but without the scorecard and tees. Grab two water bottles and place one outside the toe of your putter and one inside the heel of your putter. Grab some chalk and draw a line at setup perpendicular to your target line. This is the line to check to make sure your putter is square at setup. Hit putts without hitting the water bottles back and through. Only practice this from seven feet and in.
Place a tee a foot outside of the toe of your putter head. From here, lie an alignment stick on top of the tee at a 45-degree angle and place your golf ball under the alignment stick. Hit putts 10 feet and in without hitting the alignment stick. If you find yourself hitting the alignment stick, focus on the one-unit movement and have the feeling of the back of your lead hand pushing the ball to the hole through impact. This keeps the putter lower to the ground and ensures you don’t break your wrists.